Announcement

Collapse
No announcement yet.

Team Kaizen - The Honey Badger

Collapse
X
 
  • Filter
  • Time
  • Show
Clear All
new posts

  • Haha, well at least it is more resilient than the 1.0 version. Thanks for the box, I am sure it'll hold up better than the one in there now.

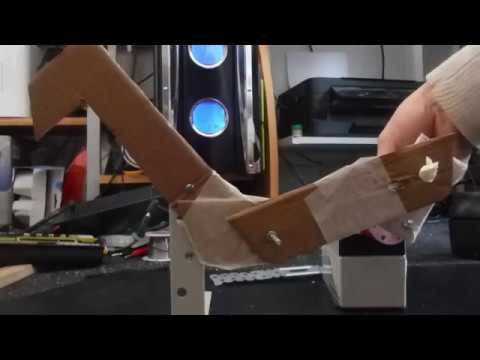
    Videos! I was having difficulty with my video editor so only the melees.


    Melee I


    Melee II


    Melee III


    Melee IV

    Comment


    • The Honey Badger is now utterly disassembled as the Nylon 6 HS crossmembers have arrived for the 2.1 refit. I've found a massive chunk missing/pressed out in the base plate which won't have helped with the robot moving and practically every screw/bolt is bent or warped in some way. I must confess, I've never worked with Nylon before, I guess it'll be a case of drilling slowly & cooling?

      DSCF5830.JPG

      The wooden crossmembers are cracked in every which way and probably will not last much longer. However, since I've got the crossmembers cut practically to length by the suppliers, the motor mounts will be the first thing I'll work on. The base plate/side panels will need sanding down to remove any damage to them.

      The electrics are in good shape all things considering. The motors may want cleaning up a touch but there is otherwise nothing to do to them.

      Comment


      • I've decided to make a go at seeing if I can make it to Gloucester (only the Saturday mind) so today I've been cleaning up the base panel and installing the new crossmembers. Money and time have both been very limited recently so I've not had a chance to try the Nylon bars yet so I'll save them for something else if they don't make it into The Honey Badger. So I've gone for a harder wood for the members this time rather than pine so if anything, it'll weigh a bit more. I'll be adding some L shaped brackets from the top crossmember to the side panels to help absorb some of the hits it might get.

        DSCF5833.JPG

        Electronics are now all mounted in and on the box so that is basically a case of screwing it into the base plate and adding in some foam to pad it. The motors themselves have new mounts ready to put into the robot and are much, much lower than the originals, thicker as well so they'll have less of a tendency to bend. This should finally resolve the motor mount (and thus traction) issue once and for all.

        Original on the left, new on the right:
        DSCF5832.JPG

        Comment


        • Hi,

          If you make it to Gloucester and want to upgrade the wood for something a little stiffer then let me know.

          I've got some 2" x 1" solid aluminium bar, 1" aluminium box section, various sizes of right-angle and checkplate. More than enough spare to donate some to another featherweight build.

          Regards
          Steve

          Comment


          • The 1" box section is too small for existing holes at the moment and 2"x1" bar I wouldn't have a good use for. The checkplate might come in handy through for remaking the front protective cover on the front of the wedge though...

            Side panels are now capable of being screwed onto the crossmembers and will measure up the new supporting brackets tomorrow lunchtime (getting a bit late to be doing drilling and what not). The drive motor holes will need to be re-drilled as the the rearmost crossmember has pushed everything forwards by about 10mm but otherwise, just waiting on a delivery of flange screws for the mounts and then it'll go back together within a day.

            Comment


            • We are going to Gloucester! Mounted the Tupperware box onto the base plate, mounted the new mounts onto the plate, eventually managed to get the motors in though be assured, 2x Gimson 13.7:1 motors + mounts on a 250mm wide panel is a tight fit and motor holes drilled out and wheeee!

              The Honey Badger is now so much more controllable than last time, must be the weight pressing on the back wheels to allow the motor's power not to go to waste. If anything, it has become a little twitchy but I'll take that over spinning drive wheels and no traction. Managed to lunch a castor ball at the community centre though so that will need replacing but in short, the robot will be at Gloucester for the Saturday.

              Comment


              • Great to see everyone at Gloucester! I was only able to attend for the Saturday but had good fun in the arena with The Honey Badger 2.1. The fights finally saw the robot moving properly, damned zippy when it wants to be.

                I definitely need more practice time driving the thing. The tank controls make the robot sensitive to how much input I am giving at any one moment and it does mean that it prone to rushing before the squishy meaty thing behind the controls realises it and boom, in the pit. Also, it needs a weapon capable of self righting it, considering a axe at the moment. Not much in the way of damage though the flail went missing after the first fight, as did my link cover. The wheel came off at one stage and one of the chisels is bent but nothing a good whack with a hammer won't fix.

                I missed recording the first melee but I have videos (which are not very good) for the rest of the FW melees on Saturday.


                Excellent to see FW robots like BattleAxe, Venator, Mutiny, Luna-Tic and Bruiser at the event, many thanks to the Mutiny team for the Aluminium check plate, I'll look to use that in rebuilding the front wedge after Maidstone.

                Comment


                • Good to see you at Gloucester! Honey Badger doesn't half shift when it needs to

                  Comment


                  • Many thanks, first time it has really driven properly since being built. It was great to see you there as well, hope you managed to get a new chain for your axe.

                    The Honey Badger was in bits again today, the flange screws holding the motors in have bent and the Tupperbox, perhaps unsurprisingly, has cracked (needs more screwing down in places to spread the load). The grub screws for the wheel hubs have bent again but nothing that can't wait until after Maidstone. However, considering it needed major surgery after Stevenage, Team Kaizen is living up to the name! :P

                    Will be hamming things back into a straight line and teaching myself how to drive the thing properly if the weather holds out tomorrow.

                    Comment


                    • So The Honey Badger is back together and, save sharpening the chisels, straightening the front wedge plate so it looks respectable and charging the batteries, is ready to go again. For a active weapon though, I've been re-watching various episodes of Robot Wars and recapping the opponents from Stevenage and Gloucester to see what I could feasibly build.

                      I've decided on a axe and I want to see if I can build a reciprocating mechanism for it (in a similar vein to Mortis, which you can see in action in the first fight of the War of Independence episode of RW Series 4). Whilst I am sure I'll lose some punch in the axe because of the losses in the mechanism, I am convinced that it'll pay off because it'll hit faster because it can repeatedly fire without me needing to hit a switch.

                      This won't appear until 2.2 but so long as I get the linkage measurements right, it should work quite well.

                      Comment


                      • Wouldn't to crank mechanism like this do the trick coupled to an linkage or another crank do the trick ?

                        crank-animation.gif

                        Comment


                        • I had trialled something similar in a static model before hand but I wasn't sure how the measurements would pan out but essentially, yes, it is going to be that sort of mechanism.

                          Wikipedia (reference) describe the mechanism as a crank rocker mechanism, which handily show where I've been going wrong with my linkage length between the motor and the axe arm. I need to get a higher geared motor though, the 12v Como 50:1 motor is neither powerful enough and is too quick for this application.

                          Comment


                          • I think you'll be better off mocking it up with some cardboard and some paper fasteners. That's how I'm personally laying out the plans for my reciprocating axe mechanism for Ratatoskr.

                            Comment


                            • The static model I referenced to was literally a old metal bracket, a motor and some cardboard with bolts holding it together. The motor quickly ate the linkages but here we go:


                              Deadliest weapon in the world right there :P

                              Comment


                              • Ah, I see I see. Well, as soon as I get my robot on it's wheels, and I put my prototype mechanism together, I can give you a look at what my design is, and you can always give it a shot yourself. Also, start with hand cranking instead of using a motor, else it'll just do what happened in your video, as cardboard isn't really designed to be used with motors like that. :P

                                Comment

                                Working...
                                X