 Tweet
Tweet
Really digging this featherweight!!! Build a heavy!!
-
-
Been really bad on a daily update basis so just going to combine it all into a single post
11-06-2013
Hey, I found trojan 2
Well the box containing all the parts for it anyway. I was mainly looking for useful things like, cradle, link, possibly armour panels.
2013-06-10 22.02.50.jpg
You can see the changes of size between them both. Trojan 3 is longer but it comes back in like a U shape. Yep, Not too proud of these.
2013-06-10 21.59.54.jpg
All the handy old bits. Cradle will definitely be used. Not sure about the rest.
2013-06-10 22.18.14.jpg
After a bit of work on trojan I have decided that the travel on half of the wheels is just too bad and I will need to most likely remake them or even pick up some new wheels. Time isnt an issue
Good news
My wotty, pro peak and power supply still works. Not sure why it wouldn't but you never know. However my 24v 3700 nimh back has died. It can hold about half an amp after a few cycle charges. I have had experience with bad battery packs before and have forced amps through them ultimately destroying them.
12-06-2013
Only a few hours to spare but I knew I had to fix the travel on the wheels. One wheel on each side was fine so I transferred them onto one now finished side.
I dismantled the remaining wheels and worked on re drilling and fixing them and amazingly managed to completely fix one wheel.
The other was beyond repair and I had to use a spare bane bot wheel which I haven't used. Re drilled and reattached the spur gear and also completely fixed. Funny enough the new finished side is far better then the old finished side
Also I managed to get the ni-mh pack to charge properly after a few cycles.
Here is the test with a wotty and the 24 volt pack
Sadly all the youtube enhancments will take a few hours to process so excuse the shakey, bad colour and sideways video till it sorts it self outComment
-
So I received my new li-po packs and 85a bot bitz esc. I have spent most of the week planning the internals and weapon.
2013-06-14 00.37.04.jpg
First I thought testing was well in order. Was sort of lucky as I tested it with a 20cell ni mh pack (when it says only 18cell)
But it runs fine and didnt even get warm. I recorded it incase of massive fireworks!
FInally settled on a drill fitted in the rear with a shaft going to the front driving a 20/1 worm gear.
I will construct a controller with limit switches to control the travel of the lifting prongs.
The weapon motor, esc’s and li-po packs are goign to be fitted quite close together. So challenge was to mount these away from each other as well as the robot armour. I also wanted the battery bay to be quickly accessible to charge batteries.
cadded holder.JPG
So week was spent designing and constructing this rear compartment.
Lipo pack fits well. Not snug so will need a bit of padding
ESC fit really well
The HDPE housing weights 200 grams which I am happy with.
2013-06-16 04.10.25.jpg2013-06-16 04.11.39.jpg2013-06-16 04.10.45.jpg
weapon motor is not fitted yet but mainly due to still needing a 6mm shaft and built attachments.
Weighed it and currently at 11kg with everything but weapon prongs and shaft (wont be much weight) and armour panels
2013-06-17 00.39.07.jpg
Its heavy but can shave some weight from the wheels as the 2 giant spur gears haven't had any weight reduction.
Armour looks to be about 3mm ali top and bottom and 3mm steel/hardox front and sides welded for extra strength
Its not indestructible but the chassie is very well braced. so I should consider that after my 3mm ali is 6mm nylon and some parts after that 8mm hdpe and if thats punctured, most of the components are 10-20 mm away from the armour
I plan to also make some additional spare panels to replace them as most of the robot snaps together.
Next jobs is to order the last bits.
Sheet steel.
worm gears
electronics for the weapon controller
Heavyweight may also start a lot sooner than planned which I don't mind
Plan to finish 2 personal projects after this feather then will work on an antweight.Comment
-
I would suggest you drop a few cells. Although your 20 Cell pack is 24V nominal (which is fine) they can often peak at > 30V when coming off the charger. As the spec'd voltage of the FETs is 30V in the 85As I would strongly recommend you keep the voltage of any pack you connect to it < 25V.
SteveComment
-
Cheers Steve.
Forgot to say but I wont be using the 24 volt pack in this robot. I will be using two 3cell lipos which is recomended.
I am lucky as the 20 cell pack was freshly charged and isnt stable so was probably very close to 30 volts.Comment
-
What motors is this running on?Comment
-
300 watt scooter motors
Specifically the unite MY016
They used to be on technobots but are still availble from many retailers
http://www.ebay.co.uk/itm/Electric-S...-/171054508554Comment
-
Okay, thanks.
What will be powering the lifter weapon?Comment
-
Drill motor, not sure of the voltage
9.6 or 12 volt drill motor (with drill gearbox) into a 20/1 worm gearComment
-
What about the Argos ones? They're only £15 at the moment.Comment
-
All ready have it mate. It probably is from argos but I bought it about 4 years ago so cant remember.Comment
-
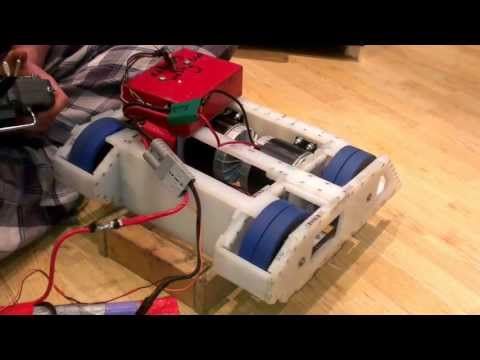
Managed to have thursday evening to my self to wire it up
Not terribly exciting news but surprisingly time consuming. And now I finally get to test drive it....yeeey
This is how it runs in a tight empty part of my front room with half a charged pack. I hope to at some point go to my local gym and really open up the throttle in a sports hall. Apologies as I got my half asleep fiance to film it before bed and the framing is a bit off.

Wiring isnt as tidy placement wise as I had hoped but no open terminals, no weak spots and thick gauged wire to supply the current to the beefy motors. Have three untouched cables (12volt out for weapon, 24volt LED and ground).
QhNU_OxV9T1lHFvMhLNO7gSa8Q836f7ht5SqmlGqHOE.jpg
Weekend to do list:
- Fit weapon motor and shaft
- Fit prong shaft
- Fit worm gears
- Wire up motor controller
- Create mount for RX and motor controller
- Weight reduce everything as much as possible
- Check weight and calculate how much I have left for the armour
I also found my flickr account and my WIP of Trojan 1 and Trojan 1v2
Shame as It looked ok but I was so careless with the weight that as dave said I had to cut so many holes that the robot was essentially useless.
2218782243_b02e49cb3b_o.jpg2219576332_6fa19d82b1_o.jpg2225146365_6f4e332c90_o.jpg2509190257_800cef0d79_o.jpg2510022632_5468f50b22_o.jpgComment
-
Looks like it drives very nicely!Comment
-
Thanks man
Been too long since I got to drive a robot around.
Comment
-
Bullet point edition
- Front weapon mechanism fitted and awaiting metal prongs and limiters
- Smaller armour pieces are being fine cut and fitted
- Very close to finishing, estimated 2 working days left
Right featherweight progress has been good and end is in sight.
I finished attaching the weapon mechanism with a worm gear setup. Was initially worried as the shaft was flailing wildly but after a bit of bracing its nice and centered and works well. Its a tad quicker than I would've hoped so limiters are well in order to stop me over traveling it in the heat of battle. I expect it to be able to lift 6kg at least
2013-06-26 10.36.17.jpg2013-06-26 10.36.38.jpg
Now its a very fiddly job of cutting the smaller armour pieces (some you would expect to see on an antweight)
Starting to regret my design but in future it will be handy to maintain. If a piece gets too damaged during an event I can simply cut a new part and fit it rather than giant bulkheads.
I have settled on 3mm steel front panal
3mm ali top panal
and another layer of 10mm hdpe for side armour
It may not sound like much but its very well braced under it with lots of nylon and hdpe
Realistically the armour in parts is outer armour, inner nylon chassis, inner HDPE bracing.
Before a spinner competition I will plan to upgrade the front panel to a hardox equivalent. And possibly replace the entire side panels with ali
I only really have 2 weeks before I have to do a massive flat cleanup for family flying over for Brazil
This weekend jobs
- Finish cutting and fitting smaller panals
- Weight reduce wheels
- Wire in limiters
Following weekend jobs
- Cut and fit top and bottom panals
- Cut weapon prongs from box section and weld on
- Cut and attach front armour panel
- If time permits weld on side and bottom lips for additional attachment.
That should put me well in time for Newport
Still haven't had the opportunity for a test drive. Would like something nice and flat to test its speed.
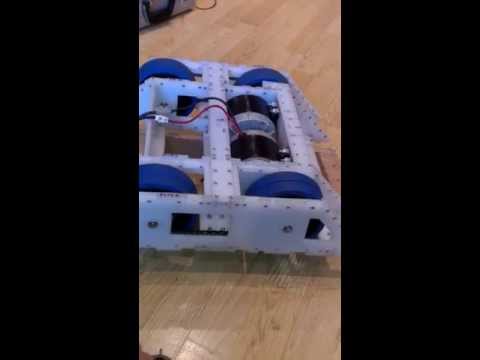
Decided to have another drive in my front room with fully charged batteries. My cat has been constantly curious about the robot so thought I would see how she reacts. Not remotely scared. Dont worry, I didn't come close to hitting her but do stay and watch till the end.

Comment
Comment