 Tweet
Tweet
Wow, thats awesome
-
-
How did you cut the HDPE so neatly?Comment
-
A display model tablesaw and hand tool love. :PComment
-
Nice! Did mine with a circular saw but don't look anywhere near as good.Comment
-
The finish on the cut surfaces isn't great. I had to use a non-factory edge for one of the sides and so I just tidied that up with coarse grit sandpaper as best as possible. It doesn't match the other side but, being white, happily all you really see is general white, they only feel different. As long as no one rubs my robot it should be aight. :PComment
-
Even a small table saw with the right blade will cut plastic very neatly. I found that a thin kerf blade with a low tooth count meant for ripping wood will cut thru PE, polycarbonate and most other plastics like they were air. The only problem is that the blade will vibrate and leave a somewhat rough edge. If you use a carbide tooth blade with a thicker kerf and still a low tooth count, you can get almost a mirror polished edge, but you need a bit higher powered saw. The secret seems to be avoiding any friction from the sides of the teeth, so using a fence to keep the cuts straight is a key feature.Comment
-
The overall dimensions are accurate enough with just the regular sold-with blade. The finish is a little rough, and it bites quite easily, but in terms of being close enough to CAD for it to work it does the job. If the finish bothers me I tidy it one way or another. Sadly HDPE just goes gummy and nasty when using fine-finish (fine grit sandpaper for eg) methods, the coarser the clean up often the better. I used a fence for the long cuts, which was a piece of wood clamped to the bed, spaced 6cm from the blade in this case.
To drill the holes I clamped the HDPE pieces to the alu bulkheads and transferred the positions, then used woodworking bits to do the counterbores/sinks etc.
Don't have time/need now, but after the champs I may look at getting a different, more suitable blade for the tablesaw. Intend to work more with nylon as I can source it easily, and from past experience that doesn't cut too nicely with the existing disc.Comment
-
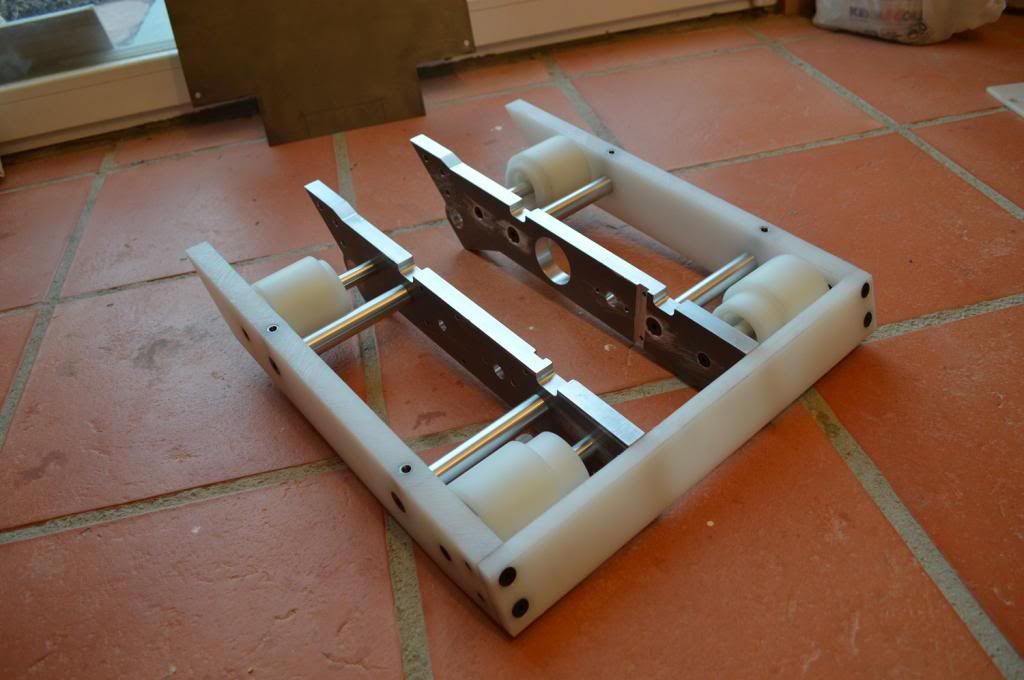
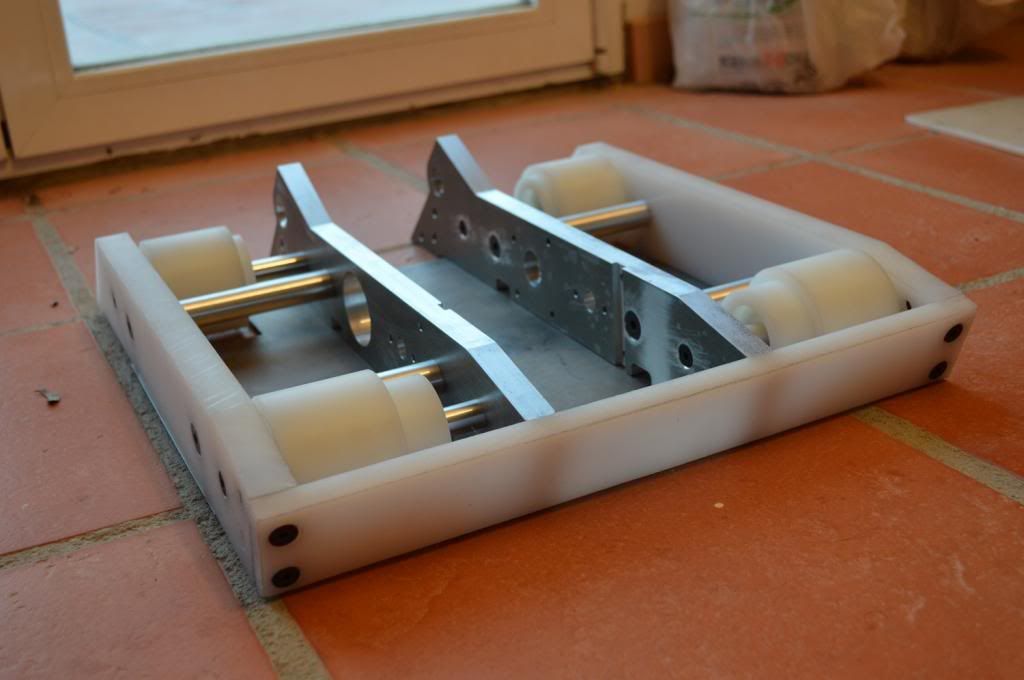
Some progress. I've cut and partly bolted on the 12mm HDPE back armour. It is currently only bolted to the outer armour (with barrelnuts, for the curious) as I'm reluctant to put many attachment holes in the alu bulkheads until I have all of the width-dictating elements in hand.
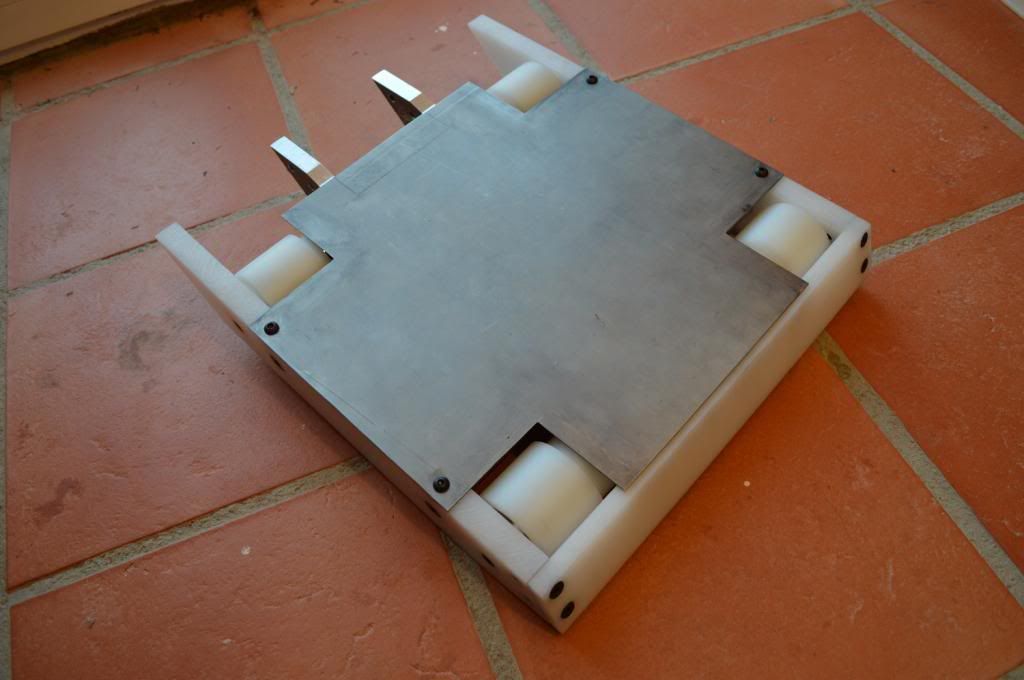
Have also done a bit with the base. It isn't structural, all it has to do is keep the electronics in, thus is it just 1mm titanium. I had already cut the wheel cutouts but had to make them much wider to accommodate the (more recently decided) 2" wide wheels. It is also only attached to the outer panels for now. This is done with some inserts I made, which are M10 on the outside with an m6 thread down the middle. Point being I can bash the bolts in and out without wearing out the HDPE and, of course, it's much stronger than that, whilst still less faff than more barrenuts. The coarse thread of the M10 holds well in the plastic - I got the stiffer variety of HDPE with this in mind.
The wheel bodies are only in the pics for mockup purposes, they need a fair bit more work pulley-wise yet.
Said pics:

One of the inserts. They are 12mm long. No idea how they will work in the long run but they have already made life easier dis/assembling.
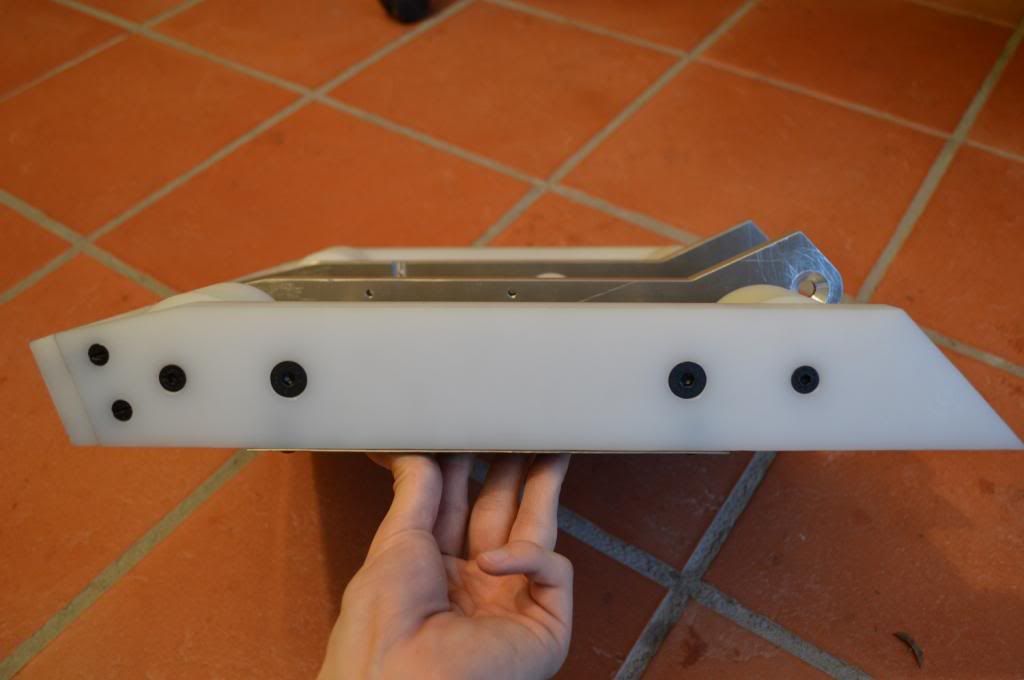
In profile, showing the barrelnuts (I found some black ones, was so chuffed about that! :P)
Right way up, showing the back.
Jeroen is busying away with the machining for the drum, and Mario is in talks with a company local to him to get 3.2mm hardox watercut for the wedge. Cutting it tight!
Cheers.Comment
-
Solid AF man. Shame you won't finish in time :PComment
-
Wow..........
That looks solid
Lol, hope it gets done in timeComment
-
Will there be anything holding together/spaced apart the 2 aluminium bulkheads? Or is it just the back plate and the base?
Looks very solid and precision made though.Comment
-
The inner bulkheads are spaced/held together by the 10mm alu motor mount plate (which is slotted into them, you can see the slots), and the 20mm weapon shaft is also structural; it sits 5mm into the bulkheads and has an m10 bolt in either end clamping the whole lot. The hardox wedge is welded solid and will also play a structural roll, hopefully completely locking up the front.
I wish I hadn't needed to use HDPE for this machine, I fear it'll be the root of many problems, but I had to start building with the design I had, and that design still used HDPE. :P
The back is by far the weakest area. It'll be a matter of luck and driving dictating the fate of the bot.Comment
-
Randy is looking good Ellis
Judging by the slimline profile it might even fit underneath Massacre's blade!Comment
-
It doesn't :3Comment
-
It might after a fight or two though. :POriginally posted by harry hills View Post
Jeroen came online and greeted me with some pictures of the machining progress on bits for Rango. I can't really describe how chuffed I am. Give this guy a medal.
First-
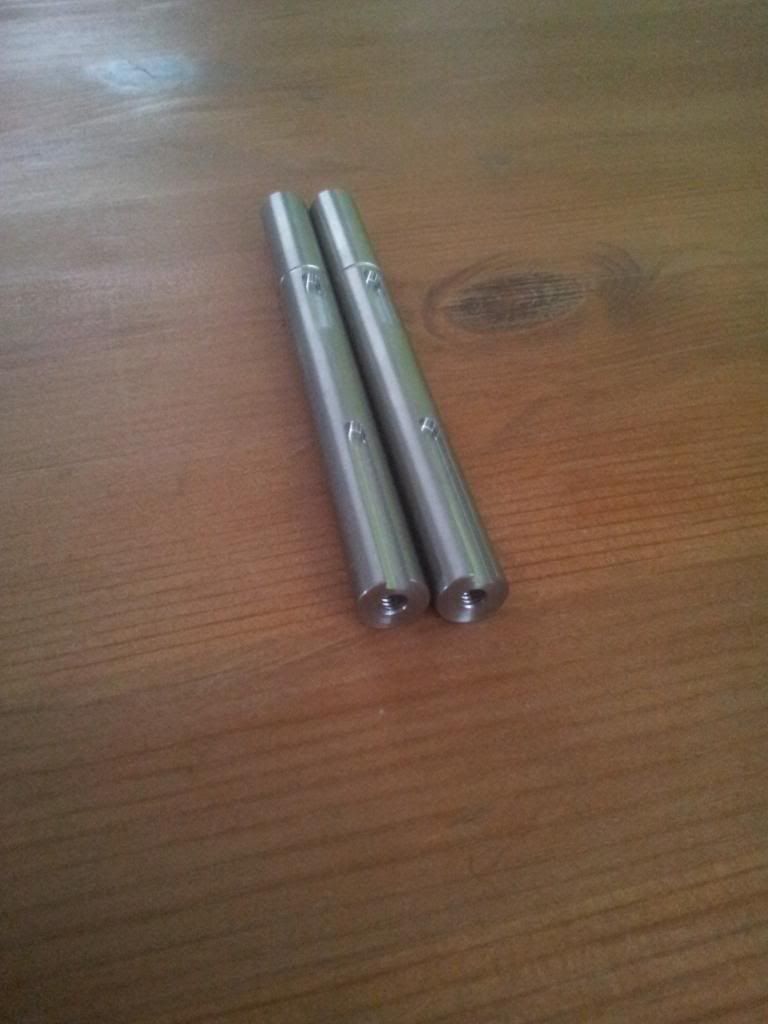
-these are the drive shafts that transfer power from the right angle gears to the drive. The gears have keyways, as do the pulleys, and I bought some 3*3 keystock. I am completely doing away with setscrews for Rango in the hope it'll make the drive a tad less unreliable. The shafts are 10mm titanium to try and save some grams.
Second-

-one side of the drum is done, as is the OD. The threaded holes are what clamp the discs to the drum (5x m8 bolts) and the two holes right on the edge of the drum are for pins, intended to take the big stresses. The bolts would probably do the job alone, but this design means the bulk of the energy is stored in the drum, not the discs, so energy has to be transferred through to the tooth tips. The pins will be bits of 10/8mm ti, the drum is 7075T6.
Also visible here is the weapon shaft. The original was going to be 20mm silversteel (I may still use this if I have the weight) but this one, in more 7075, saves some very welcome weight. I had Jeroen make it, as no amount of adjustment will stop my minilathe from cutting a slight taper, which across 4" is a bit more apparent than I'd like.
Lastly,
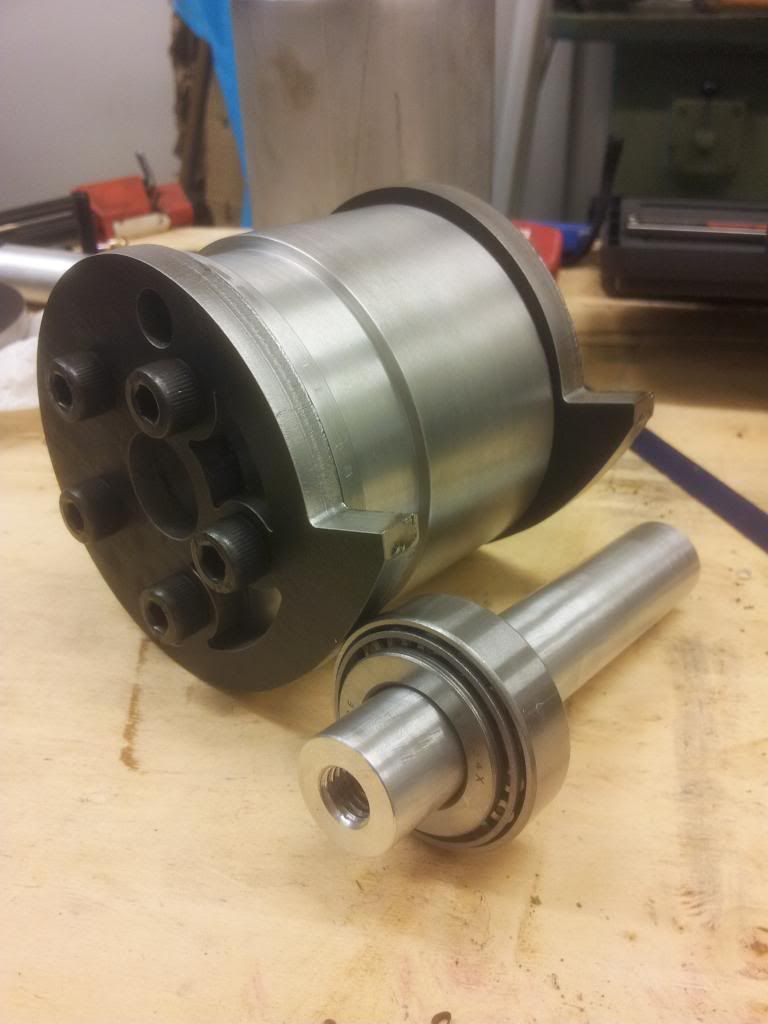
The half assembled setup. The discs are Creusabro 8000 (cut alongside Harry's weapon bar(s)). For a sense of scale, the drum is 86mm in diameter, the tooth tip covers a 120mm circle.
Once again, Jeroen is the guy behind the machines. I can't wait to get these parts, and I can't wait for the day I might be able to make them myself. For now, that medal really needs to happen. Last edited by Ellis; 21 March 2014, 22:05.
Comment
Comment