Announcement

Collapse
No announcement yet.

Liftoff (FW) build diary

Collapse
X
 
  • Filter
  • Time
  • Show
Clear All
new posts

  • #61
    Re: Liftoff (FW) build diary

    Now that's a coincidence!!
    Yeah, we'll meet up but, but not our machines.

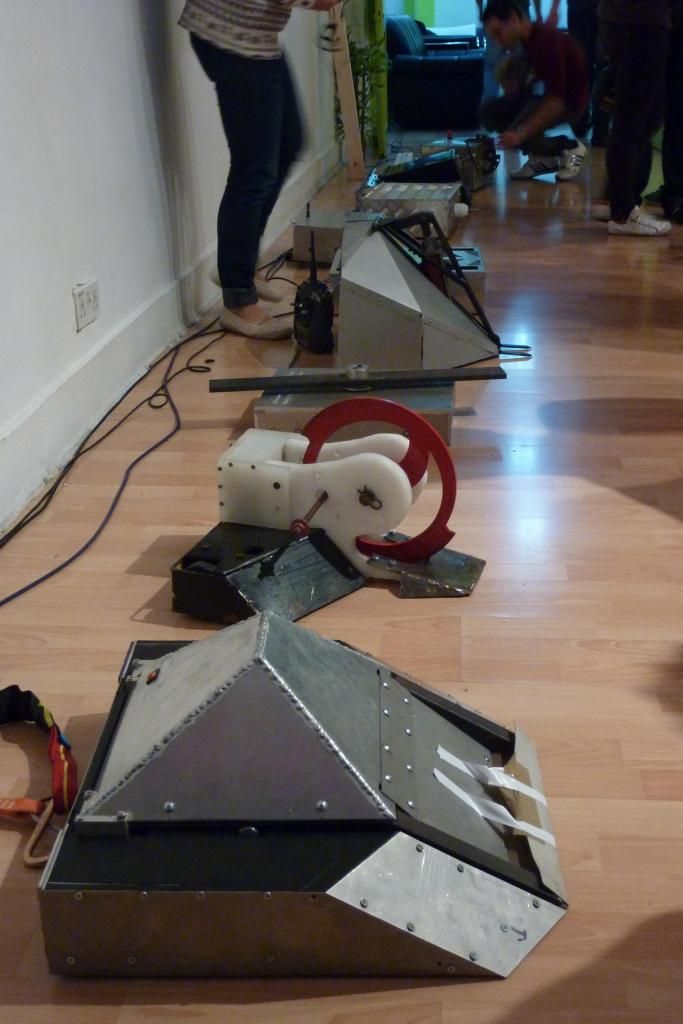
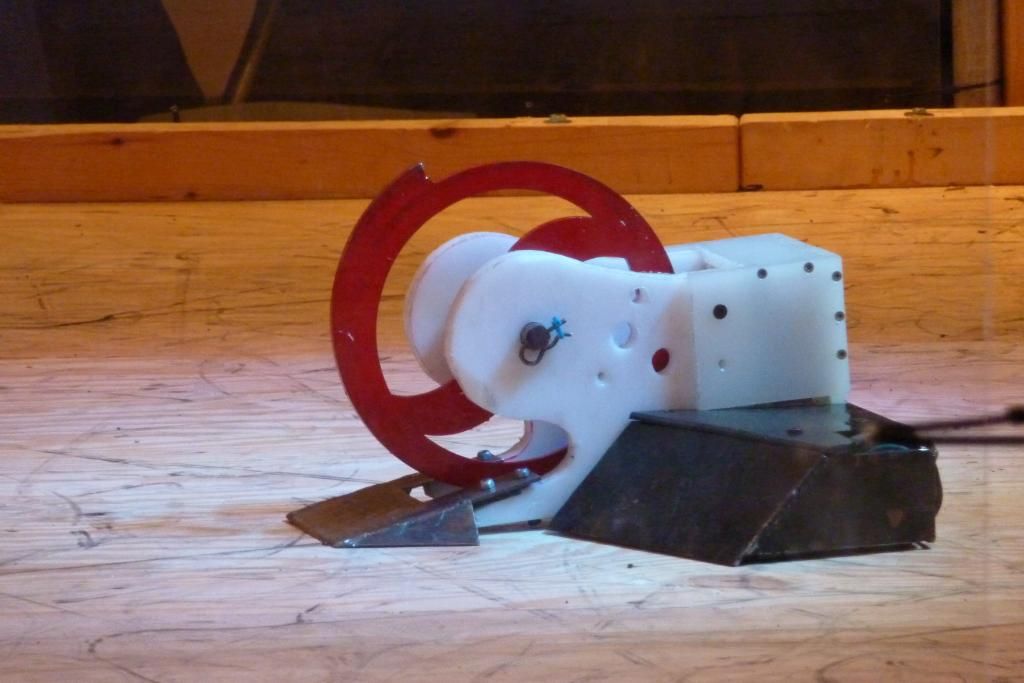
    Final adjustments ready, and its working fine now...more photos and vid clips after the event...

    Comment


    • #62
      Re: Liftoff (FW) build diary

      Back from this year's event of robot wars - with a very good result. All the hard work and late nights spent this week paid off as Liftoff made it to the finals and won the event

      Now I need a break, tomorrow I'll be on the plane for a well deserved holiday!

      The machines are getting better every year and is nice to see the competition evolving from simple rambots and wedges to more elaborate machines with movable weapons, having said that our level is still far away from you guys over here - we had the opportunity to see first hand a proper machine brought over from the Uk by Will Thomas - Inertia - it was really impressive to see it shredding a wooden beam, with no effort at all.

      Some pics of the finalised build, and some from the event this afternoon:

      Mostly finished here, added titanium armour to the sides


      and some more no the flipper arm, just an extra precaution as I know one of the competitors has a bar spinner which might get stuck in the HDPE


      Top cover installed - now it looks almost complete.
      A planer blade at the flipper tip gives us a high probability of getting under everything. It was a nightmare drilling through it as its 3mm HSS, but a couple of spade drills and a lot of sweat later I managed to put three holes through it


      Liftoff and Inertia side by side, Flipper tip covered after someone cut his hand against it


      Final match, bar spinner Pacman could not reach us with the blade, it got flipped and that was the end of it


      General view of the pits


      First time I seen it snowing in Malta!!


      Will and his machine Inertia


      And the winner after the battles were over - still like new hardly scratched
      Will try to put it on a diet now as it weighs approx 17kg, and if I could get it down to 13.5Kg I could one day bring it over...who knows!

      Comment


      • #63
        Re: Liftoff (FW) build diary

        Getting that to 13.6kg shouldn't be hard.

        Question: Is that bent bar where the ram hits really necessary ? Would have thought it easier/lighter to have a flat plate across the top of the robot and you ram angled slightly (or are you unable to do that ? I can't tell what the ram looks like at the bottom really).

        Comment


        • #64
          Re: Liftoff (FW) build diary

          The robot looks great, congratulations on your event win!

          Out of interest, did you run with tracks in the end or just rear drive wheels? If you went for tracks, I'd be keen to see a couple of pictures of them and their assembly if you wouldn't mind during a spare moment. It's something I'm looking into doing myself, and the more research the better :wink:

          Comment


          • #65
            Re: Liftoff (FW) build diary

            Original plan was to do without that bar on the actuator, but as we had no time to spare in re designing the thing we opted for what we knew worked for sure...but that is in my mind dave - to remove as much moving parts as possible...

            As for the drive, its track driven...its a real pain though to set up, specially if you dont have precision methods of machining things...will give you a detailed description and photos of how it works later on...
            (in about 10 days time... I'm off to the airport now :wink: )

            More updates to come soonish...

            Comment


            • #66
              Re: Liftoff (FW) build diary

              A small recap of the event in Malta two weeks ago:

              http://www.youtube.com/watch?v=3TPP2ZgZ8-8

              Comment


              • #67
                Re: Liftoff (FW) build diary

                Let me know when the next event is, i would be willing to fly over and have some fights with cobalt

                Comment


                • #68
                  Re: Liftoff (FW) build diary

                  you could use Cobalt against that piece of wood just like Inertia did, or for you maybe a steel tube will be more fitting :wink:

                  Comment


                  • #69
                    Re: Liftoff (FW) build diary

                    want to fight robots not peices of material

                    Comment


                    • #70
                      Re: Liftoff (FW) build diary

                      I know, I know...

                      I doubt any one would fancy a fight with cobalt tho! But maybe one day we might create something which can take a good fight, next event is in a year's time...in the meantime will try to get Liftoff in-line with FRA rules just in case we could come over

                      Comment


                      • #71
                        Re: Liftoff (FW) build diary

                        A couple of short clips - final stages of flipper testing


                        We were testing that at around midnight as we were quite tight on time, at one point we wanted to throw something in the air just to have an idea if the throw was strong enough. So I set the regulator at 6bar, took the machine out in the front garden and put a 2L water bottle on the flipper edge... and gave it a go... that threw the bottle one storey in the air and almost over to our neighbour's balcony!


                        Monday will try to find time to open up one side where the drive system stays, take a couple of pics and post a description of how we got it set up. It was a real pain to get it working, and we ended up with an emergency set up - it worked but I'm not happy with it, so it will be modified for sure - or totally eliminated and replaced by wheels...

                        Comment


                        • #72
                          Re: Liftoff (FW) build diary

                          Found some time this morn to open one side of the track drive and took some photos of the internals as promised - Any questions or suggestions for improvement are welcome :wink:

                          I took quite a lot of photos as they speak much more than words and makes it much simpler to explain.
                          A quick description of what we used and how it works:

                          General view of the bottom sides with all parts assembled


                          First to go is the titanium armour plate, this plate also acts as and end plate for the forward roller pin..


                          Next to go is the HDPE side - the hole at the forward side holds the shaft of the forward roller. The hole in the middle was the hole for the tensioner, but that was later discarded.


                          This is a view of how it looks from inside - pretty much simple, the large wheel connected directly to the drive motor, turning the tracks around the forward roller, the track slides along the bottom face of the machine which ensures even and full contact between the floor and the tracks. This eliminates the need of complicated rollers and other stuff you normally see in a tank drive.


                          It was not all plain sailing though, we started off by machining a pair of drive wheels out of Alu. The outer surface was knurled for better grip, but we found out it was not enough in testing phase. It slipped of the thread - most probably bec the knurling used was not coarse enough, so we coated them with a material similar to the threads themselves and that was one problem solved.


                          View of the coated drive roller. It was a pain in itself to machine it in 2 parts to save from machining time and material costs. Its hollow from the other side so that part of the motor can fit inside the wheel, that saved about 10cm from the overall with of the machine


                          This is the HDPE side plate which holds the forward roller in place and pretty much also holds everything in place
                          It took quite a beating, infact from the photo you can see that the threads ate away into the sides and sliced a groove. The problem here was that we did not allow for adjustment of the rollers, and without any precision method of drilling perfectly aligned holes for the rollers, the thread is bound to move to one side or the other


                          The solution had to be a quick fix one as time was running out (we did that 2 days before the event!)
                          I milled about 1.5mm of the hdpe sides with a router and inserted those two pieces of stainless plates, hoping the threads will slide against them. It worked, but from the photo its visibly polished where the belt was rubbing.


                          This is the thread, its quite durable, having been used for these last four events and survived is a remarkable feat!
                          We had it made at a local shop which sells conveyor belts, it is sort of got two layers, one canvas at the bottom which looks like bonded in some way, and then a rubber coating is moulded externally.
                          We always debate between us which is best to have for better grip - a thread with a grooved rugged surface (like we have) or a flat smooth surface? We never came to a conclusion as we tend to accept only physical evidence not theory!


                          The forward roller...


                          Another issue is the amount of tension to put on the thread. The more you tension the more current the motors will draw. On no load with nothing attached the motor was drawing about 5A. When we put the belt on and tensioned the thing first time, it was drawing about 20A :shock: - that is free wheeling back side up without touching the floor! After reducing the tension and fixing the sides for better slipping of the tracks the current dropped to about 11A.


                          So thats it, if you had to ask me is it worth using tracks I'd say - not really, they're good for looks and for the sake of having a tank like machine but otherwise I think its a hassle, I don't really see an advantage.
                          Having said that I still do like the track drive, and before giving up on it I want to give it another try - this time I'll make the fwd roller tensionable, and adjustable so that I can adjust the tension and align the belt with the same mechanism...already got a plan for that, but its still in my brains...need to put it on paper and then on to metal! :wink:

                          Sorry for the long post - hope you find it interesting

                          Comment


                          • #73
                            Re: Liftoff (FW) build diary

                            That is brilliant! I have wanted to run tracks on a machine for ages and all I could come up with was using double sided timing belts which are horrendously expensive.
                            That has given me some great ideas for machines!
                            An idea that might help to tension the belts is this...
                            http://www.popsci.com/files/imagecache/ ... iagram.jpg
                            http://www.popsci.com/invention
                            The machine uses a moving front pulley to keep the tracks in tension so even when the suspension compresses it stays on. Its basically sprung and runs in a grove. That could easily be implemented on your machine with the space you have.

                            Comment


                            • #74
                              Re: Liftoff (FW) build diary

                              I would't say we spent a lot on the tracks, can't remember off hand.
                              Re spring tensioning its a really good idea - we had thought about it but couldn't figure out how to do it in at the time...it has to be something compact as even tho space looks abundant, its still tight.
                              I had thought of using a gas dampers as a tensioner like this... they are 150N each, think they'll work?

                              Comment


                              • #75
                                Re: Liftoff (FW) build diary

                                Next step in this build is to go lighter and get it in-line (as much as possible to FRA rules)
                                This means that from 17kg Liftoff must shed at least 3.6kg (quite a lot!)
                                The single heaviest part of the machine is the flipper arm, then the motors, and then the pneumatics...
                                The motors weigh 1kg each - if I get to replace them by two Gimson GR02 I'd save more than 1 kg.
                                The flipper arm is a problem, at the moment its 1 square section 1.2mm thick, its quite heavy...don't really have much options, never seen titanium square section, so next option is aluminium.
                                Think I'll use alu square section 1 by 3.2mm thick 6082T6 but not sure if its strong enough as I need to put some welds to it as well And besides I have to calculate the weight lost bec if it's not too much it might not be worth while...
                                Any advice re aluminium flipper arm?

                                Comment

                                Working...
                                X