Announcement

Collapse
No announcement yet.

Deathly Hallows - Beetle - Evil K'Weevil

Collapse
X
 
  • Filter
  • Time
  • Show
Clear All
new posts

  • #31
    Cut out the second wheel slot today. Garage was freezing but made good progress none the less.

    IMG_20180120_124339.jpg

    Drilled some fix holes in the base for the weapon motor.

    IMG_20180120_134051.jpg

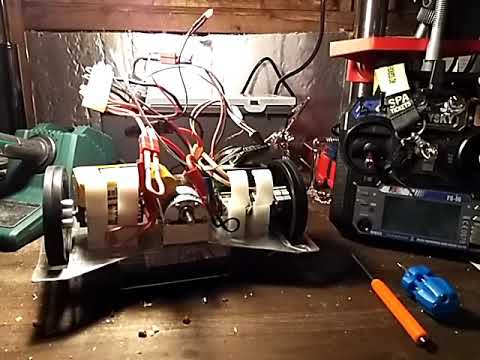
    Then I laid up some parts to check it will all fit together/ Never know if the drawing and reality will match.

    IMG_20180120_135046.jpg

    I noticed one of the motors is branded as Actobotics and the other is another brand but same part numbers. Will check it matches.

    IMG_20180120_094626.jpg

    Shocked at how small these little motors are.
    Weighed every things and also measured some parts to check dimensions are as expected. Most things are coming in a little lighter. Not sure if that is my scales though.

    Comment


    • #32
      The drive motors you have look to a little bigger than the ones in Shu!, they weigh 72g each (https://www.technobotsonline.com/918...otor-15-1.html). The weapon motor you have looks similar to my Pololu 37mm motor, though I guess at a much lower gear reduction (mine is 131:1)?
      Last edited by Ocracoke; 21 January 2018, 01:57.

      Comment


      • #33
        Did a little bit of soldering. Motors and deans connectors done.
        Wires to Receiver, ESC's still required to be soldered and laid up. It will be tight.

        I also assembled the wheels, and mounted on the motors.
        Looks like I need to buy a new alun key as none I have fit the grub screws properly.
        I decided to double up the wheels, they're quite narrow but this will add to the weight so I need to be careful.
        IMG_20180123_213445.jpg

        This leads me to the next issue. Mounting these little drive motors. I had planned to make a small part from aluminium a 90' angle and fix to front, but looking at the size of them this won't work. I think I will need to make clamp mounts. As the motors are 22mm I found some pole clamps used for drone arms and ordered them. But they are coming from China and may not work. Backup plan will be to make something from HDPE.

        Comment


        • #34
          What about using pipe clamps, since I imagine they'll come in "nearly" the right diameter (though some manipulation would be required)? 2x on each side would surely be enough here?

          Comment


          • #35
            That's a good idea. The clip clamps may not be tight enough, but perhaps I can tighten it with some insulation tape. Normally they have only one central fixing but if inside two that could sort out any twisting. I should be able to adjust the hight as I can just cut it down.

            Update: picked up some screwfix 20 for £2.99 seem to fit quite tight. Maybe be hard to replace motor without breaking the clip though. But they will be fine for now.
            Last edited by Deathly Hallows; 25 January 2018, 13:29.

            Comment


            • #36
              Genius idea regarding pipe holders.

              IMG_20180125_204145.jpg

              Had to drill a bit of a recess to take a 3M nut. But after one failed attempt got the rest to work fine.

              It's going going to be really tight. Cut a small bit of the wrapper away so LiPo cables could go out straight instead of at 90°

              IMG_20180125_204030.jpg
              It will go. Pretty sure. Hopefully a 3/32" Allen key should arrive tomorrow and I can tighten the grub nut on the drive motors.

              I hope I can make it run in an open chassis this weekend

              Comment


              • #37
                Genius idea regarding pipe holders.
                You are welcome I have/am considered/considering doing something similar with The Honey Badger only one end of the motor is supported by the inboard mounts.

                Comment


                • #38
                  IMG_20180126_183653.jpg

                  A bit of wiring tonight. I read somewhere I should remove the positive lead of the second ESC to avoid overloading the RX.

                  IMG_20180126_192555.jpg

                  My extra hand was a great investment. Makes soldering a lot easier, even if I am still not that skillful.

                  IMG_20180126_200455.jpg

                  This little rat's nest is almost complete. Deans connectors for the motors and most internals. XT60 for battery. Created a negative and positive power bar to try and make it a bit easier to follow.

                  Will mount the Sabertooth 12A on its side. Metal plate facing outwards. Most expensive part of build.

                  Disappointed with the weapon motor speed when I see it. Massive torque, but after reading other threads I am getting RPM envy.
                  Last edited by Deathly Hallows; 27 January 2018, 20:34.

                  Comment


                  • #39
                    It never occurred to me to use that type of connector as a power bus. I used a PCB designed for a quadcopter on Eric the destructor. Half the board isn't being used and it's about 30mm squared, which is rather annoying..

                    Comment


                    • #40
                      Managed to get all put together.


                      I thought my soldering was getting better, but it sucks! Two failures just from all the bending needed to get it together.

                      I've been using red and black wires from reels of mains cables and lighting cables. But it's very stiff. I bought some multicore 30A cable but it's a bit too heavy duty. I am also wondering if using the deans connectors is overkill. Space is going to be a premium inside the sealed chassis.

                      I think I will have to rewire with lighter multicore cables for more flexibility and without the deans connectors - but at least I know what to plug in where.

                      Comment


                      • #41
                        Glad it is all coming together and mobile on a static test

                        I bought some multicore 30A cable but it's a bit too heavy duty. I am also wondering if using the deans connectors is overkill.
                        If it comes to it, I found a spool of speaker wire from B&Q works very well. It is stiff in very short sections but longer than 10cm or so and it works fine. I used that in The Honey Badger and works OK for that application. XT30 or 60 connectors work very well for this as well.

                        Comment


                        • #42
                          Got a delivery today. The long awaited shell has arrived. Just in time to fit it together over Easter weekend.

                          Comment


                          • #43
                            Delay was because it 2mm titanium and it's a complicated shape.

                            IMG_20180328_110730.jpg

                            Assembly began with disassembling the aluminium mock up.
                            Fixing the drives to the mounts.
                            IMG_20180330_111152.jpg

                            The mounts were not perfect, I must have measured wrong, but I managed to get them on.

                            IMG_20180330_151027.jpg

                            All going to plan at this stage. Then I plug in battery to test it.

                            POP! Oh no! ....

                            Lesson 1: don't use the same connector for your kill jumper/switch as you use for your battery

                            yep I connected the battery wrong and possibly blowing the lot

                            But here was my saviour ...
                            IMG_20180330_184920.jpg

                            a fast reacting blade fuse (30A)

                            Comment


                            • #44
                              thank goodness I installed a fuse

                              IMG_20180330_193350.jpg

                              walls and weapon rested on not fully fitted. but it looks mean

                              weapon is titanium too. it's nice and tight on the spindle but need to get a grub screw

                              IMG_20180330_193336.jpg

                              coming in under weight.

                              but looking very full
                              using some pond filter foam a it's quite stiff but very light and breathable so keeps things cool

                              IMG_20180330_193402.jpg

                              tomorrow I want to try and fit the sides and a roof.
                              there was meant to be a second floor roof panel, but some how it was not done and as it was a favour and it turned into a lot bigger job than expected I don't want to ask again.
                              I have aluminium and some polycarbonate, I quite like the idea of a clear roof. what do you think?
                              Last edited by Deathly Hallows; 31 March 2018, 07:06. Reason: Pictures added again

                              Comment


                              • #45
                                I can't see the pictures in your second post but it does look like it is coming together - thank goodness for fuses though, eh?

                                I have aluminium and some polycarbonate, I quite like the idea of a dear roof. what do you think?
                                Do you mean clear? If so, I have PVC and Arcylic roof for Shu!, the latter I prefer using when testing to make sure all is well underneath but for combat, I stick with the PVC lid. If I get around to it, a polycarbonate roof would be nice.

                                Comment

                                Working...
                                X