Announcement

Collapse
No announcement yet.

Ratatoskr Build Diary. (Featherweight)

Collapse
X
 
  • Filter
  • Time
  • Show
Clear All
new posts

  • #31
    So... been a while since I've updated the build diary, but thankfully, today, me and my friend has managed to get the wheels onto Ratatoskr. Ended up buying the wheels from RogueTwoRobots, and they fit perfectly onto the robot, no loose wheels, nothing. All we would need to do is tape up the link to a safer place, which in turn pulls the wires away from the robot motor.


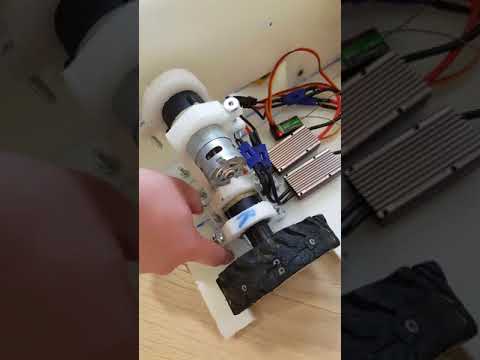
    My friend, Sid, held the camera for this one, but it pretty much shows the progress we had made, but it also shows how scatterbrained we are, haha.

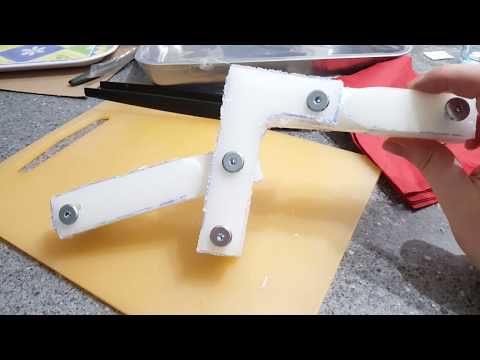
    Either way, we can move on to the next section of the robot which has gotten us smiling from ear to ear. Weapon. Well, the mechanism for it anyway.
    Last edited by Outlaw; 22 December 2017, 17:20.

    Comment


    • #32
      Gratz on getting it moving. I spy the tupperware box the battery is in, looks similar to what I use in The Honey Badger. I can use some foam padding or even a couple of folded shopping bags to keep my batteries in place along with a lid.

      You would need to consider adding a guard or using some cable ties to keep the wiring away from the wheels mind to prevent them being chewed up. Surprised it weighs 6.6kg though - mine weighs 9.6kg all finished.

      Speed controllers are TZ85As.
      Last edited by Ocracoke; 10 November 2017, 16:51.

      Comment


      • #33
        Looks great guys!

        I have same issue for battery. Velcro strap is an easy option need to source one myself.
        Thought about adhesive Velcro patches but perhaps battery heat would weaken glue.

        Comment


        • #34
          Oh don't worry, I don't plan on leaving the battery loose, that was just for the test drive. Soon as we get the weapon on the bot, I'm gonna stick it down with velcro tape and cushion it with packaging foam, but I will put a more intact tupperware box in instead of a cut up one haha.

          Comment


          • #35
            Glad the wheels have got it moving. Could always trim the excess bike tyre from the inside of the wheels as they're not really contacting the floor at that point and it would save you having to trim your chassis.

            Also if you ever need to replace the tyre (I forgot they were quite worn), go to your local Halfords or bike shop and ask if they have any spare old tyres from their bike services. When I mentioned to the guy at my local that it was for a Robot Wars robot, he told me that he'd hold on to some old ones for the next time I pop in.

            Comment


            • #36
              No no Jamie, thank you for selling them to me, made things 100% easier and allowed me to move onto more pressing matters, such as the weapon. Funnily enough, the great thing is that it has about 2mm ground clearance or so, so it runs smooth AND I don't have to worry about ground clearance either.

              As for a deadline to see if we can get Ratatoskr anywhere, I'm hoping to get it ready in time for Manchester next year in April. Which ideally gives me 6 months, tops.

              Weapon wise, I've marked out what needs to be cut out, which I hope to do tomorrow, and then it'd be back to screwfix to get myself some M5 penny washers, just for safety sakes.

              Comment


              • #37
                Funnily enough, the great thing is that it has about 2mm ground clearance or so, so it runs smooth AND I don't have to worry about ground clearance either.
                You may find with a 2mm ground clearance that the swarf/unevenness from the arena might cause issues. This isn't as a big problem in Extreme Robots but the Robots Live arena can be strewn with debris from the HW fights. That being said, I do get more traction on the Robots Live arena than Extreme Robots... :P

                Hope to see you in Manchester

                Comment


                • #38
                  So, after a long 2 hours work... we've got something that resembles an axe mechanism... or at least something as close to a motorised version of shunt... that isn't motorised, haha.


                  As you can see, it's not completely finished yet, there's still a lot of cutting and slotting to do, we just didn't have the time to do it as we were losing daylight as the time went on. But hopefully at some point either tomorrow or next week, we'll have the axe mechanism in Ratatoskr... and fingers crossed, not have it blow up in our scruffy bearded faces.

                  Comment


                  • #39
                    intresting what weapon motor are you using ? wasn't it a 350w scooter ?

                    Comment


                    • #40
                      Nah, it's going to be the same motors, the 18v drill motor that is up there in the middle of nowhere on the test drive of Ratatoskr. If need be, there'll be some weight reduction, but, also, if need be, I can always try and drum up some money for a scooter motor if needed.
                      Last edited by Outlaw; 22 December 2017, 17:56.

                      Comment


                      • #41
                        yes i spotted it after i posted, i am tired. bit worried that it will either be not strong enough to self-right

                        Comment


                        • #42
                          Well if it doesn't, then I'll have to fix that bridge on the way of crossing it... if that makes any sense. Basically if it doesn't flip it, I'll look into a more powerful motor.

                          Comment


                          • #43
                            not sure one would be enough but a a RS775 or aTorpedo 850 might be a good candidate if you dont want to use a scooter motor

                            Comment


                            • #44
                              So I managed to mount the mechanism onto Ratatoskr, and although it's a rather snug fit, just a little bit of wear and tear will smooth it all out and should mean that it'll run smoother too.


                              I apologise for the shaky/crap camera positioning and the shoddy commentary, but handling my tremors is not one of my strong suits. (Doesn't help that I just finished using the jigsaw cutter too.)

                              So I just need to do a little more work on the mechanism, and it should (don't quote me on this) work smoothly. The amount of time I've had on this has been quite... troublesome, considering the weather, the material and the fact that my friend's been out of action thanks to illness. But the finish line is getting closer and closer... I just need more time.

                              Hopefully tomorrow, I'll be able to get more of the cutting done if the weather stays right, then reassemble, remount and hand-test the motion of the mechanism again. If that goes smoothly, then I can get straight on with the wiring, mount the link sections properly, and get those batteries in a more suitable protected area. I have a couple more takeaway boxes from asda ding meals that I can just cut and test if need be, and if that fits and works, I can tie it all down and get working on the armour.

                              Speaking of armour, I think I've got quite a bit of weight to play around with, though I haven't weighed it recently. So in theory, I could go for thicker HDPE then layer some thin sheet metal from B&Q on top of it. That's in theory though. If that doesn't work, then it may just end up being HDPE.

                              Comment


                              • #45
                                So I just managed to sort out the long piece that was being a hindrance, and now it works fairly smoothly, although I may need to make the hole connecting long piece to L pieces a little longer, but that'd be for another time.

                                So with a little wear and tear, it'll more than likely run better than I expected. So tomorrow or day after, I should be able to solder up and connect the last of the wiring, and replace the lights. Then that'd be that done and I can finally move onto the armouring... and figure out how to apply to the Manchester event, haha.

                                Comment

                                Working...
                                X