 Tweet
Tweet
Originally posted by Zenith
View Post
-
Brushless drive gives more power in a lighter, smaller package, if you use outrunners though you need to have them not rubbing up against anything. This also requires you to reprogram the ESC's to give forward/reverse control and enable braking, which is far from difficult to do it's just another step to setting up drive. -
Alright, thanks!
TL000488.jpg
First parts are coming in. First tragedy already occurred - I was denied my drawing. Much sulking was to be had.
Leaving for a holiday in just over 2 weeks, so currently still very much in the process of getting the parts together and seeing how the lay-out is going to be.
One thing I have already decided on is weaponry and overall theme. I like control type of bots a lot as they rely heavily on driving skill, so it's going to be a lifter. I want to get a theme going too, as comedy bots stand out and bring something extra to a fight, namely for the spectator. The plan is then to build it in white and have an ambulance theme, naming the robot "This Is Not A Drill" (which it isn't, because it's a lif- oh well you get it).
First priority for me though is to get a 2WD platform together and work my way from there. Probably will order the motors some time next week, and then it's time for some sweet unadulterated pretendobot action.Last edited by Zenith; 15 July 2016, 12:21.Comment
-
After a very exciting summer holiday it's time to get back at it. Days before departure to sunny Asia I took delivery of my drive motors; 4 12V 1000rpm DC motors, akin to the Silver Sparks used in the Viper kit.
This led to the first mock-up.
IMG_20160902_182708.jpg
Indeed - it's not as much a mock-up as it is two drive motors on a used cutting board. Contrary to what my better half believes this cutting board's destiny will not lie in dicing and slicing meat (vegetables is a different board, because HEALTH AND SAFETY PEOPLE), it will be used to put driving platforms together. This one cutting board should serve about 3 driving platforms, providing I can keep stuff from falling off and how hungry each platform is. As it is, I'm sadly not Jesus - then I would've been able to do this entire build with a gallon of water and a fish.
Batteries and plastic are on the way - white HDPE. Maybe I'll just make a new cutting board from that and hope that my gf won't notice.
To be continued.Last edited by Zenith; 2 September 2016, 16:45.Comment
-
-
As it turns out these installments turn out be a monthly ordeal. See it as a testament to my Carribean roots.
IMG_20160929_204520.jpg
I received the final order from Technobots recently, which contained some more hubs and wheels. I went with the Fingertech variety, simply because I'm already familiar with them and it's always useful to have spares that can be made from my gf's beach footwear. I just hope she won't notice her Minions flipflops have gone missing at some point (I think I'll just blame the neighbour's cat, out of spite for it taking a crap in our garden the other day).
Once again though, I was disappointed in the sheer lack of drawing in my order. I'd requested a drawing (or photo - I like to lower the bar now and then) of the best UK fighting robot along with my order, but sadly there wasn't even a print out of M2 in there. Much sulking was to be had.
IMG_20160928_175221.jpg
With all parts finally in possession though, I could finally start to get stuff lined up properly. First, I got my new transmitter sorted out by using the Viper to bind the receiver. I'm leaving the Viper in one piece throughout this process, mainly because I want to really build my first bot from scratch and I feel that using the Viper for that is like using cheat codes. And cheat codes are things snotty teenagers use in Call of Duty whilst shouting all kinds of sexual expletives about either you, your mom or both.
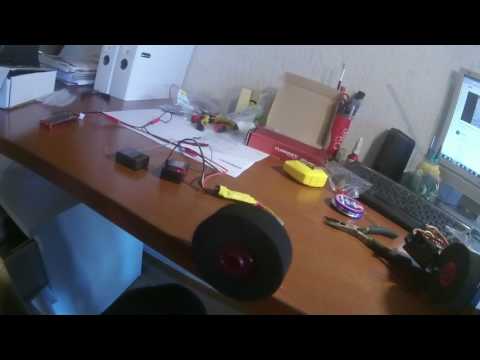
TL000647.jpg
Anyway, I digress. Along with the hubs and wheels I'd also got me some excessively bulky mounts for the motors, but soon enough these proved rather useless on something that requires armour. Yeah, good job on making a good bench testing setup there. Extra XP for me. If you have some tips for a simple and slightly less corpulently challenged motor mount solution, please do comment.
Did I actually get it going though? Ofcourse not, that's something for next month. Gotta get myself a soldering iron, along with some other tools. And buying tools is fun - it's like the men's equivalent of buying shoes.
Maybe I should ask my gf to come along and carry my bags.Last edited by Zenith; 14 October 2016, 15:10.Comment
-
Hi Greg. Looking forward to seeing what you come up with, I had quite a chuckle reading through that .
.
Those motor mounts do look really strong and beefy, I guess it depends where you want the compromise between weight and strength to be. I can show you what I've done for mine so far (and by no means am I right) I used a hole drilled into the HDPE chassis that snugly fits the motor with a polycarb plate (what I had available) on the front using the standard bolt holes. Probably weaker, but hopefully a little flex if there is any may prevent something else breaking elsewhere (that's my story and I'm sticking to it!)
20161016_170540.jpgComment
-
I like your solution a lot. I think I'll do the honorable job of stealing the idea.
I suppose those hex extenders are readily available online somewhere? I could do with some extra reach (on the axles, I mean...you dirty people).Comment
-
-
The hubs I'm using are these ones, as I'm running 1/10 scale rc car wheels and tyres, I think thats why they are a bit longer.
http://www.technobotsonline.com/polo...k-of-2-en.htmlComment
-
It seems the gaps between updates seem to be of an increasing nature. I guess it just builds on the hype.
The past few months saw the development of me entering the realm of stepfatherhood, and with it, also initiating the subsequent indoctrination of a 6 year-old into the art of robotic combat. Attacking mommy's slippers with the Viper apparently fed the bug to such an extent that the good lad wanted an R/C car for Christmas. Good thing I've got a direct hot line to the North Pole.
You see, apparently the good folks at Nikko have used the past twenty years of my absence to figure out tank drive on their concoctions, which played perfectly into my scheme. Tank drive is the be-all-end-all of our little world.
IMG_20170105_221633.jpg
To make a long story short, mommy's slippers no longer suffered the brunt of the attack. It did occur to me though that whereas I know how to fix the Viper, fixing the Nikko tank might be a tad more impossible given how everything is made of that famous CORF (Crack Once Regret Forever) plastic.
So time to avert my attention again to my own build (because well, that's why you're here isn't it?). I took the time inbetween the training sessions to get a schematic worked out and get the necessary tools lined up. I like figuring out stuff myself, which in turn also sparked the interest of our little raskal.
IMG_20170105_224656.jpg
Either that or my drawings are just hilarious. Feel free to point out mistakes and I'll try not to be offended.
Just wondering what might be a good servo to use for a beetleweight. I noticed that the one in the Viper may very well do the job, but for now, all that counts is getting a driving platform.
Design wise, I'm looking at a lifter which hides between two scoops up front - with all them spinny thingies out and about in beetleworld I'm not so keen on them munching away at the party piece; as it is, I have no plans to make my lifter out of birthday cake.
I could put one of those unblowable candles on top though and rename it The Cake Is A Lie, but I guess that breaks FRA regulations.Last edited by Zenith; 5 January 2017, 22:02.Comment
-
It surely looks like progress has allowed us a look up her skirt for once!
The past few weeks saw me satisfying both my inner and outer 6-year-old with some hardcore CAD design. Not the 3D-wizardry kind ofcourse, but the Cardboard-Aided kind. You know you've crossed a certain threshold when you're using the cardboard boxes your bot stuff came in to make your robot mock-ups.
IMG_20170116_183538.jpg
Anyways, it finally brings some light at the end of the tunnel for the two sheets of HDPE that are anxiously awaiting their brutal murder trial.
But this is not all, oh no - with having studied the inner workings of the Viper and drawing up a schematic, I finally had grown sufficient testicular awesomeness to have a go at putting together a working circuit. All the parts were there, now it was time to line them up in the correct 'no-the-square-peg-can't-go-in-the-round-hole' way (this was naturally preceded with me making a removable link first, because HEALTH AND SAFETY PEOPLE).
This didn't go without a good share of screwing up ofcourse. You might notice that this very much has a 'learn-as-I-go-along' vibe to it, so naturally, there are also embarrassing screw ups. This particular one went like this:
Step 1: Order BEC plugs.
Step 2: "Hey, the connectors come separate from the plugs! I have to assemble the plugs myself then"
Step 3: Proceed to put all the connectors inside the plugs
Step 4: Wonder why it is so hard to get a wire to stay in there.
Step 5: Proceed to pry all the connectors out
Step 6: Look at the connectors, look at the wire, and hear a penny drop.
Yes, I know. Despite all of this though, I eventually got the following setup ready:
IMG_20170119_113346.jpg
Eventually, with Lamb of God blasting a fitting AWAAAAAKENNNNNNNNNNN through the living room, the wheel moved. Here is a reconstruction:
I immediately felt like I'd popped a roboteering cherry, and felt the need for a cigarette, a shower and a cuddle. However, what I got was some post-orgasmic drama, as the plugs on the ESC would not fit on the receiver of my Spektrum DXe (a Spektrum AR610). This is all because the AR610 has those offset cavities which can't take square plugs.
Ofcourse, I could just use the HK one from the Viper (which I did for testing), but for the eventual bot I really want to leave the Viper in one piece (the AR610 also seems incompatible with the parts in the Viper by the way).
I reckon that if I want to learn how to do stuff properly (like making BEC plugs, AMIRITE?), I have to build TINAD from the ground up - using Viper parts in the eventual bot is cheating. And as Taylor Swift will tell you, cheating is bad.
Next step will be to learn soldering, and tools for that are already on the way. For a driving platform I will need to combine two wires into a single one (like a Y, not like 1+1=1), so it will be interesting to see how that will work out.
Tips are welcome and will be met with a thunderous applause from behind my computer.Last edited by Zenith; 19 January 2017, 11:50.Comment
-
Sorry to sound daft but which weight class are u building for?Comment
-
As an expert on being daft I feel nothing but warmth for your reply. It should end up being a beetleweight if everything goes according to plan.Comment
-
If you're having trouble with fitting your ESC plugs in your Rx, you can just carefully​ file the corners of the plug off. Just make sure you file them off on the correct side. I have an AR610 too.Comment
-
Very well. I shall get to work, and report back for further hilarity. Currently, I am awaiting the arrival of further tools.Comment
Comment